Waldorf First Grade Math Squirrels
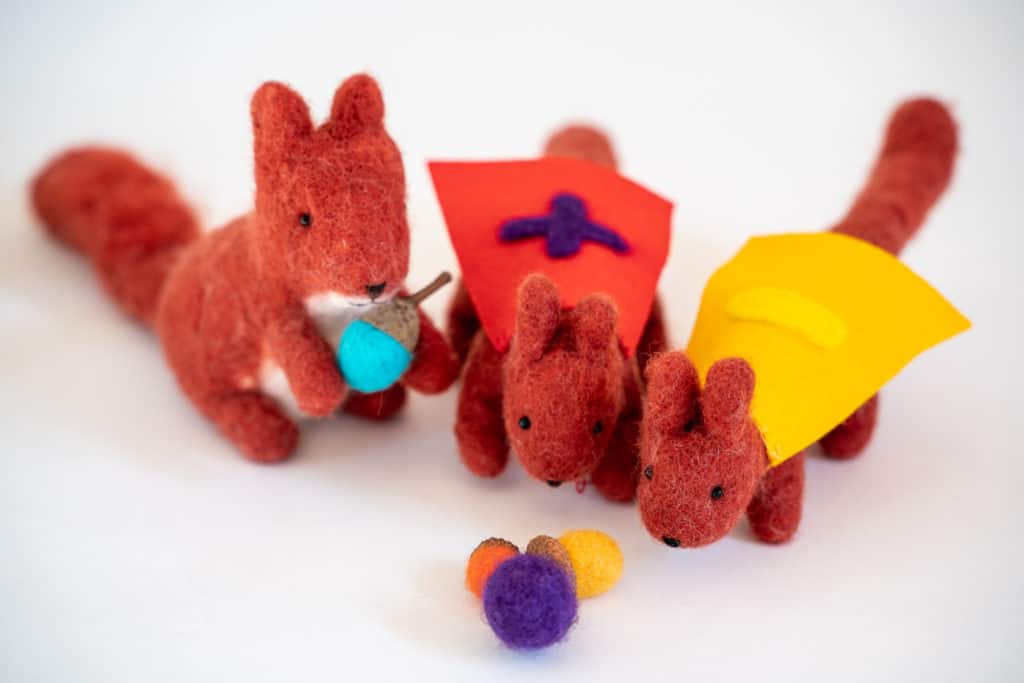

This is the story of a crafty fool. Me. I’m the crafty fool. Now before I say anything more, I don’t want you to get the impression that I regret making these. The craft itself is delightful and satisfying and magical but making a family of 5 squirrels and an owl with a deadline to have them ready in time for a homeschool lesson?? ……… Wouldn’t recommend it. But don’t let me deter you. If you feel inspired to make these Waldorf first grade math squirrels, I only advise you to start making them way in advance!
Math Squirrels using Christopherus First Grade Curriculum
The Christopherus First Grade Curriculum that we followed uses “Math Squirrels” to teach math lessons. In short, you act out little stories with a wise old owl, a mama squirrel, and her 4 squirrel children. Each of her four children discovers the four processes: addition, subtraction, multiplication, and division. It is the most DARLING and effective way to teach these concepts to young children. The squirrels were a huge hit.

Had I understood what I was getting myself into, I probably would have chosen a simple sewn felt squirrel. BUT now that they are complete….honestly, it was so worth it. They brought so much magic to our lessons and the kids will play with them for years to come.

Wet Felted Animals
I LOVED learning this wet felting technique. I highly recommend getting the book, Making Natural Felt Animals, and choosing ONE ANIMAL to make (LOL!!).

If I were to summarize the technique, it would be that you start out with a very small amount of wool and you slowly build upon it, adding more and more wool and constantly sprinkling soapy water on it. Lots of gentle rubbing and felting and then adding colored wool once the basic shape is attained. And at the end, vigorous felting.
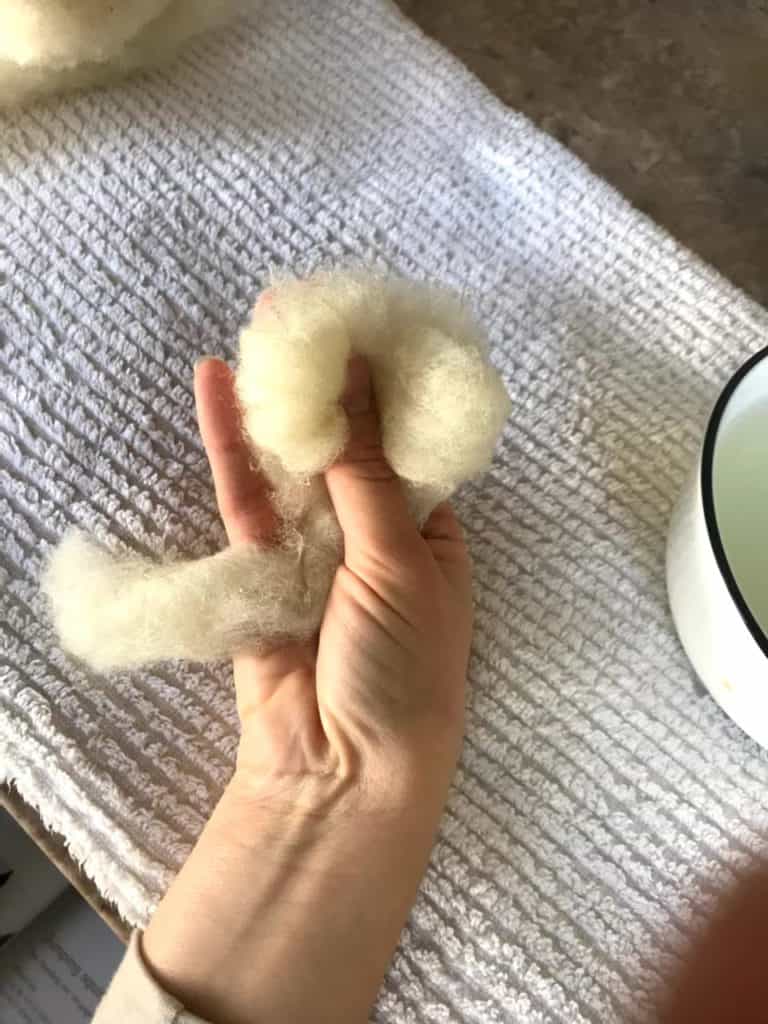
It looks like a whole lot of nothing, a failure, until you get about halfway through the process. While you are building up the wool, little by little, it looks really strange and pitiful. Every single time I thought it was going to be a flop and every time I surprised myself. I think by the time I made the 5th squirrel I had little more confidence.
You can watch me in action here. (You can adjust the playback speed to 2x if you’re short on time)
Each squirrel took me around 3 hours to make. The owl took even longer. The video above was filmed towards the end of the process. I wasn’t planning on recording a video for the blog post but my husband spontaneously started filming me and I thought it would be great to include it so you get an idea of how this technique works.
You’ll notice that it’s lots of very subtle movements slowly forming the squirrel shape. Lots of wetting down with soapy water and rubbing.

Here are all the materials that I got from A Child’s Dream Crafts!
Making Natural Felt Animals Book
Olive Oil Soap for Wet Felting
Eco Wool Batting – felting core wool : 8 oz
Ashford Corriedale Wool Roving – For the squirrels I used Nutmeg and White. For the owl, I used Toffee, Camel, Chocolate, Marigold, and White (1 ounce of roving in each color is more than enough. If you make 5 squirrels as I did then you’ll need perhaps 3 ounces of nutmeg.)
I experimented with Curly Braided Wool Roving (Auburn) on one of the squirrel tails but I realized my kids were messing it up almost immediately with their rough play so I did not use any for the other squirrel tails.
I also used a felting needle to do the eyes and beak and talons for the owl.

The book instructions explain how to make owl talons with wires inside that can actually wrap around a branch but I just improvised some needle felted talons that were flat and helped the owl to stand up alone.
For the squirrel faces, I bought glass beads and embroidery thread at a local shop.

I’m no expert at this technique, but here are my top tips:
1.Read through the Getting Started chapter of Making Natural Felt Animals more than once. Also read through a few of the first projects. Some of the basic info is explained in the first projects but then that info is not repeated in the instructions for other animals, so you might feel lost if you try to start with a project in the middle of the book.
2. Start with a project that has a one-star difficulty rating (Don’t be like me and jump straight to a four-star difficult project)
3. Have something to prop the book open to the page you are on so that you don’t have to keep drying your hands to consult the book.
4. Make sure you have a good chunk of free time, about 3 hours long.
5. I didn’t find it necessary to measure an accurate soap to water ratio, I just rubbed my bar of olive oil soap immersed in the bowl of water until the water looked greenish and murky.

6. Work on top of the most absorbent towel you have.
7. Feel free to experiment with your own techniques. The book does a fairly good job with instructions, but I imagine it must be hard to describe the felting process with words. I felt like I had to figure out a lot on my own through trial and error.
8. Keep the entire figure very wet the entire time. If the wool looks fluffy at any point, add more soapy water.
9. The animal shrinks as you felt it, so I found that I always needed more wool than I expected. Especially for the head and legs.
10. Don’t be afraid of doing vigorous felting at the end. It’s a little scary to be so rough with the animal you just spent hours on, but it surprisingly handles it well and looks better afterward.

Math Symbol Capes
In the math stories, the friendly Wise Old Owl chuckles at the little squirrels’ antics and says things like, “I call you Addition!” I had the idea to make little capes for each of the squirrels to wear after receiving their new names. To make the capes, I just eyeballed it and cut a very basic shape out of wool felt, and then we needle felted on the mathematical symbols. I laid down the wool roving and let my 7-year-old needle felt them into place.
We finished them by sewing a blanket stitch across the top of the cape, leaving long ends on both sides for tying purposes.

I was so pressed for time that the squirrels were faceless for the math stories and lessons. I added the eyes and mouth later on. One of the last-minute-made squirrels was still wet for the lesson one time haha! I ALMOST decided to leave the squirrels faceless because I was worried I would do a poor job and mess them up. But I’m so glad that I pushed through my fears because it wasn’t hard at all to add their adorable faces, following the instructions in the book!
Here’s a page of my son’s work in his Main Lesson Book that he did after the Math Squirrels story about division. It’s such a nourishing, tangible way to learn math! We used needle felted acorns as math manipulatives. I heart Waldorf Math.

I’m thrilled that these Waldorf first grade math squirrels will continue to be used in second grade! I’m excited to see what the stories will be.
Let me know in the comments below if you’re excited to learn this new felting technique! If you have any questions, I’m happy to (try to) answer them!

Want to learn how to make Waldorf-inspired toys for your kids? Join Toymaking Magic to access all of my video tutorials. There’s sewing, wet felting, needle felting, wood carving, knitting, crochet, paper crafts, and more! Only $8 / month. No obligation to stick around longer than a month! Try it out!


Omg, it looks like the most time consuming craft???? I still have about a year, so I’m thinking now is the time to start! Your squirrels are beautiful!❤️
haha! yes, definitely the most time-consuming craft I have ever done! Yeah if you can start a year in advance you can enjoy the process stress-free!
Love what you’ve done Jessica and love the faces, too! Thank you so much for partnering with A Child’s Dream on this project. ❤️ You were rather ambitious in tackling the felting of so many animals within such a short time but the results are amazing and I imagine, in the end, so worth it. You’ll have these little heirloom friends around for your grandchildren. While wet felting is indeed a meditative process and great for slowing down, maybe one animal over the course of a week next time? ????
Haha! yes indeed! ambitious but worth it! I love the thought of having them around for my future grandchildren!